Fireplace Installation Guide: Single-Storey Homes
Fitting a wood-burner in a single-storey house? The hearth, wall gap, flue parts and roof height to get right, and the smoke test that proves it's safe to use.
 The Stompies teamUpdated 2 min read
In this article
Installing a wood-burning fireplace is one of the most effective ways to add value and warmth to a single-storey home.
However, transitioning from a cold living room to a cozy hearth requires more than just good aesthetics — it requires strict adherence to safety protocols and local building regulations.
This comprehensive fireplace installation guide covers everything from flue kit specifications to weatherproofing, ensuring your home stays warm, dry, and compliant with safety standards.
1. Pre-Installation Safety Checklist
Before beginning, ensure you have the following in place:
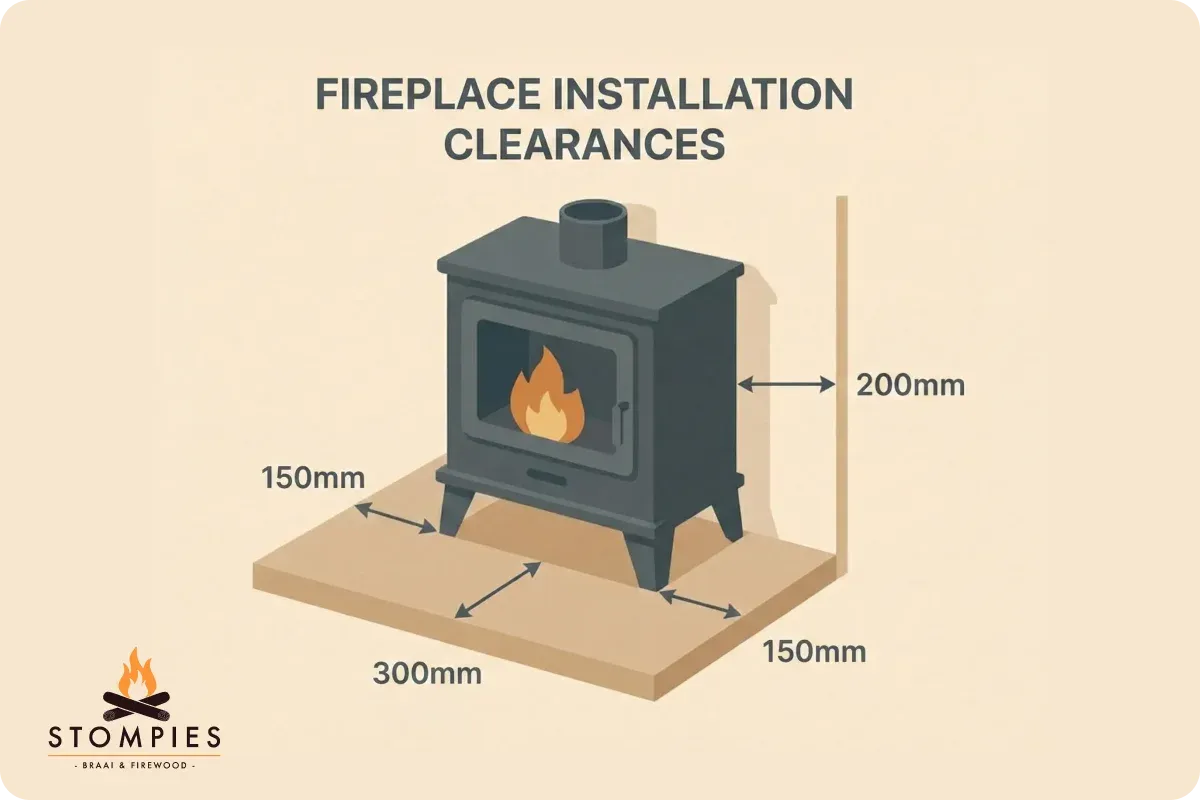
- Floor Protection: A non-combustible hearth (granite, steel, or tile) must extend at least 300mm in front of the fireplace and 150mm on the sides.
- Wall Clearance: Maintain a minimum distance of 200mm between the back of the unit and any wall.
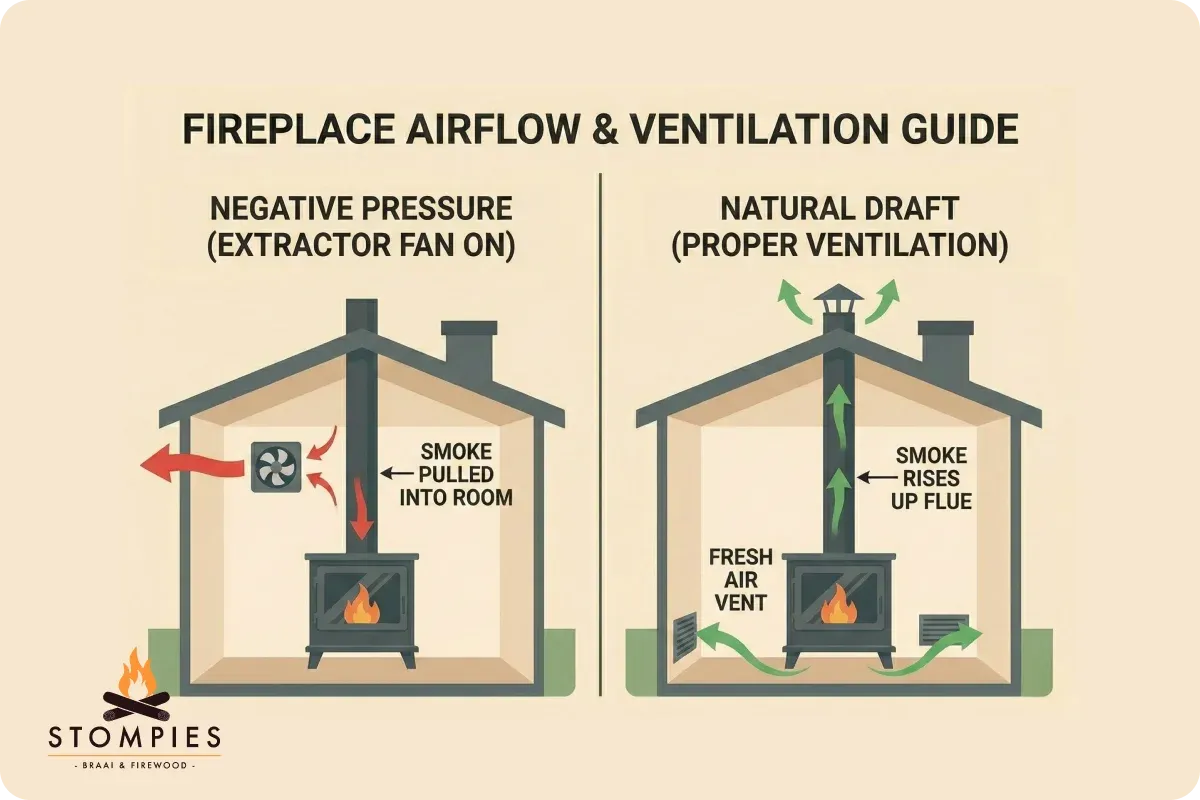
- Ventilation: Never install a fireplace in a room with an extractor fan, as this can pull carbon monoxide back into the house.
2. Technical Specifications & Components
A standard single-storey installation requires the following flue kit components:
- Primary Flue: The main stainless steel pipe (typically 150mm or 180mm diameter).
- Insulated (Double-Skin) Flue: Mandatory for the section passing through the ceiling and roof to prevent fire.
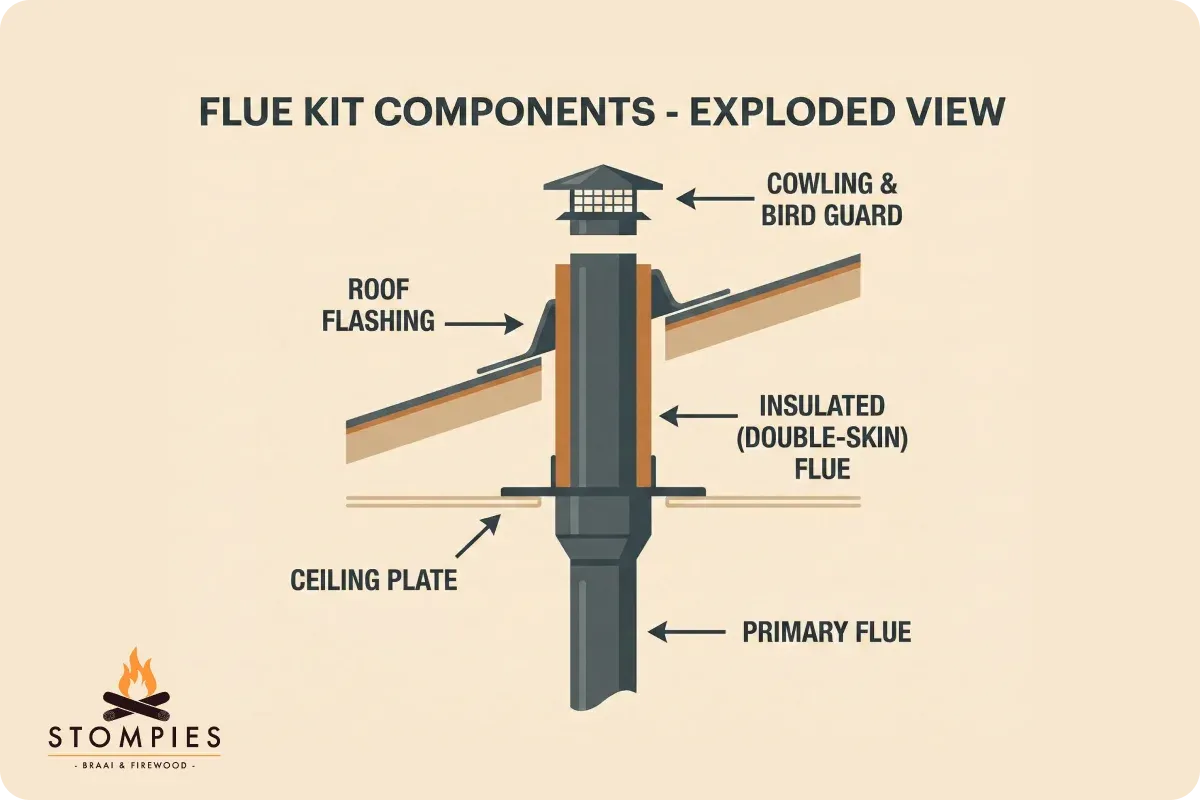
- Ceiling Plate: To neatly seal the entry point into the ceiling.
- Roof Flashing: A waterproof seal (rubber or lead) to prevent rain leaks.
- Cowling & Bird Guard: To prevent wind downdrafts and nesting animals.
3. Step-by-Step Installation Process
| Step | Action | Technical Tip |
|---|---|---|
| 1. Positioning | Place the fireplace on the hearth and align it with the intended ceiling exit. | Use a plumb bob to ensure the flue will be perfectly vertical. |
| 2. Ceiling Cut | Cut a hole in the ceiling slightly larger than the insulated flue. | Check for electrical wires or water pipes before cutting. |
| 3. Flue Assembly | Connect the primary flue to the fireplace and transition to the insulated flue at the ceiling level. | Ensure all joints are sealed with high-temperature fire cement. |
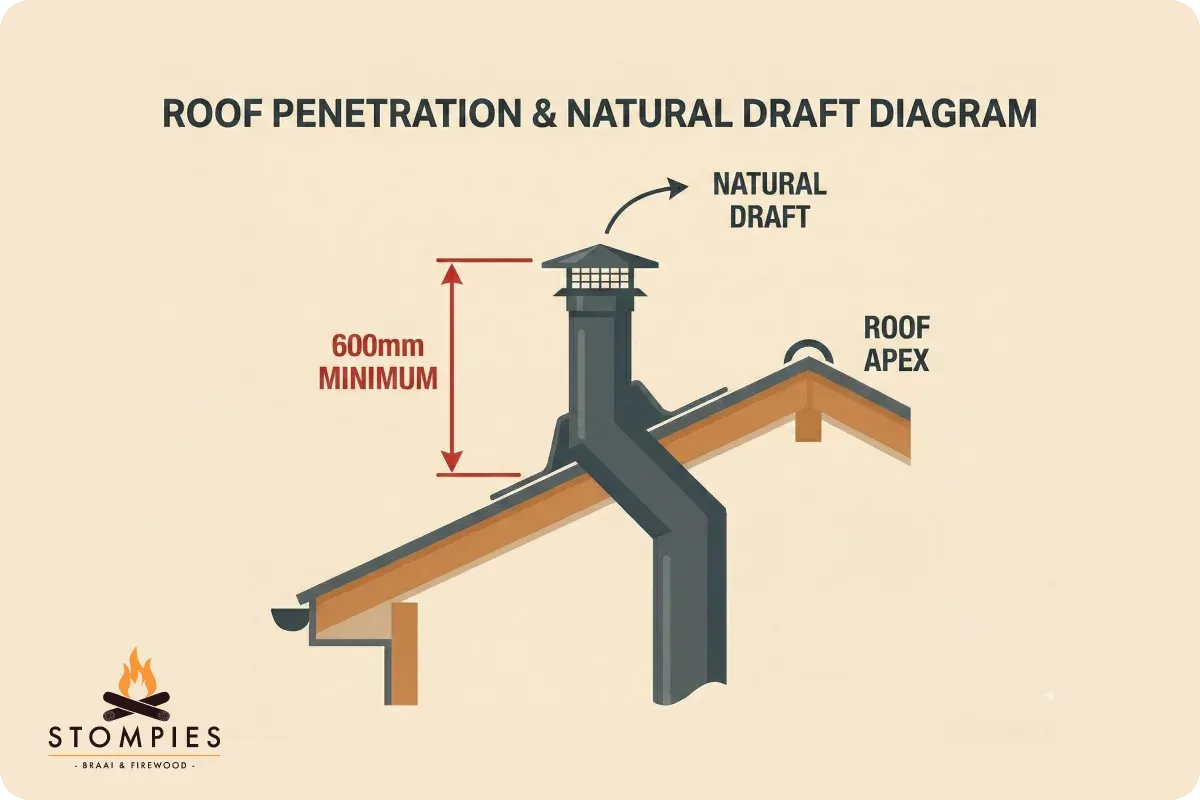
| 4. Roof Penetration | Extend the insulated flue through the roof, ensuring it clears the roof apex by at least 600mm. | Proper height is vital for creating a “natural draft.” |
| 5. Weatherproofing | Install the flashing around the flue on the roof and seal with silicone. | Test the seal with a bucket of water to ensure it’s watertight. |
4. Post-Installation Testing (The “Smoke Test”)
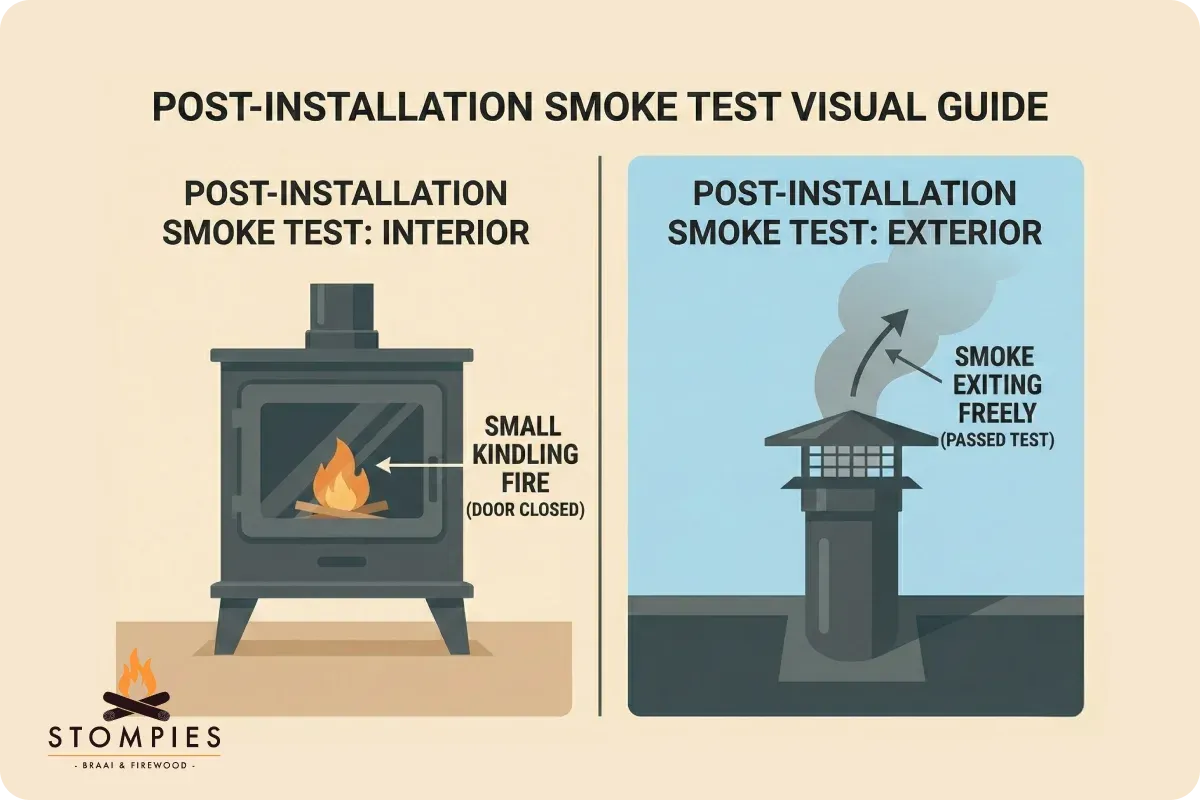
- Open all air vents on the fireplace.
- Place a small amount of kindling and an eco firelighter inside. In a fireplace, eco firelighters are the ones to use: they burn clean and won’t damage the glass the way ordinary firelighters can.
- Light the fire and close the door.
- Check all flue joints for smoke leakage.
- Observe the roof cowl to ensure smoke is exiting freely.
5. Maintenance for Longevity
- Annual Sweep: Have the flue professionally swept once a year to remove creosote build-up.
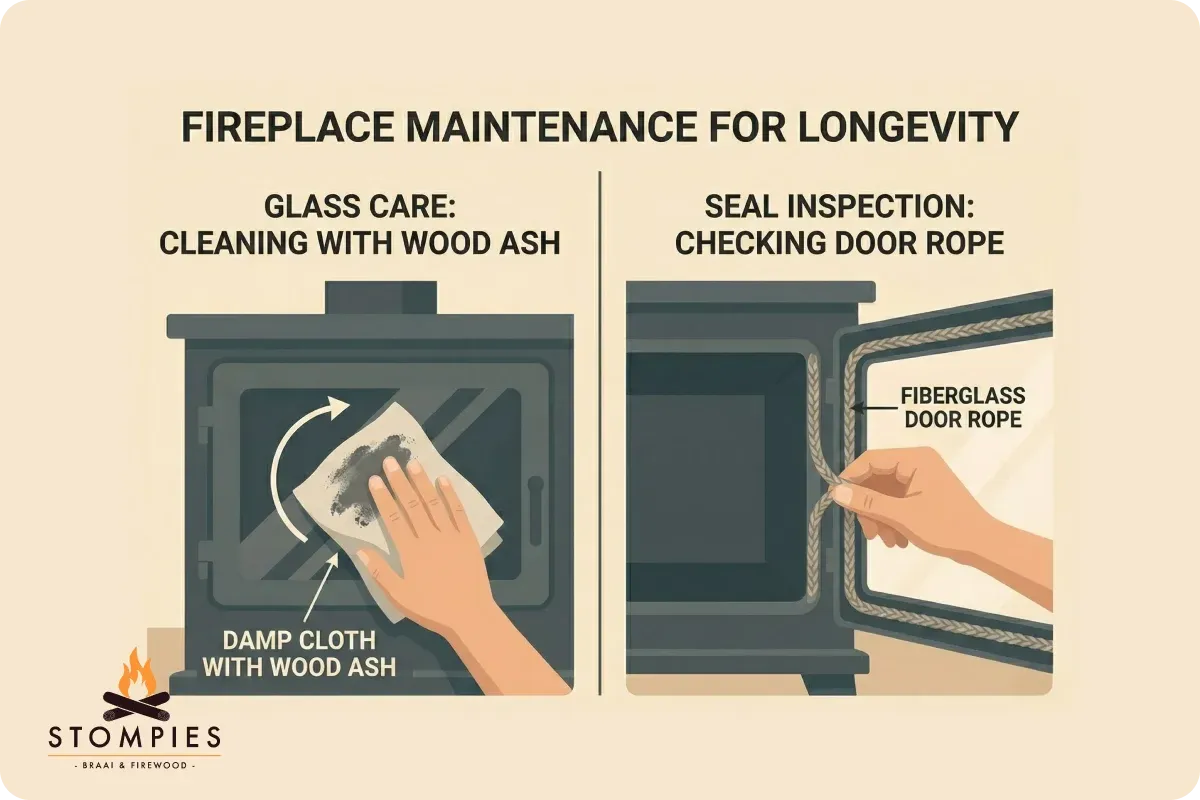
- Glass Care: Clean the glass with a damp cloth dipped in wood ash (when cold) to remove soot.
- Seal Inspection: Check the fibreglass door rope every season; if it’s flattened or brittle, it must be replaced to maintain efficiency.